menu
書いてる野郎
orebike@gmail.com
オンラインからクレカでサクっと終了。どれぐらい使うかわからないので月々の契約にしておいた。
契約後20分ほどすると初期のrootのパスワードがメールで送られてくる。これが準備完了のサイン。
CentOS 5 x86_64 (64bit版)が最初からセットされていて、停止状態になっているので起動する。起動は さくらインターネットVPSコントロールパネルからできる。
さくらの用意してくれている、リモートコンソールという機能でブラウザから直接起動したサーバを操作できる。VPSのゲストOSではなくてホストOSレベルでこのリモートコンソールは動いているっぽくて、起動プロセスも全部このリモートコンソールで表示されて見ることができた。
操作レスポンスがかなり悪いのでこれはセットアップとか緊急事態用と割りきろう。通常はSSH2で接続するほうがよさげだ。
今回は激安のRapidSSLを使うことにする。
タネを生成する
openssl md5 /var/log/messages > rand.dat
タネを使って秘密鍵を生成 2048bitでつくるよ
openssl genrsa -rand rand.dat -des3 2048 > hogepk.pem
パスフレーズを聞かれるので慎重に入力
できた。
秘密鍵からこいつを証明してもらう証明書を発行してもらう要求(CSR)をつくる・・・ややこしw
# openssl req -new -key pairlinkpk.pem -out hogecsr.pem
まずさっき鍵を作った時に入れたパスフレーズを聞かれるので入れる
Enter pass phrase for hogepk.pem:
次に国を入れる。日本だからJP
Country Name (2 letter code) [GB]:JP
次に都市を入れる東京のなのでTokyo
State or Province Name (full name) [Berkshire]:Tokyo
地域を入れる。新宿区なのでShinjuku-ku
Locality Name (eg, city) [Newbury]:Shinjuku-ku
会社名。適当。自分の名前でもいれとけ
Organization Name (eg, company) [My Company Ltd]:hogehoge
組織の部署名。たぶん開発部とか入れるんだろうけど、サーバの用途とかのっけてるサービス名とかいれておけばいいと思う
Organizational Unit Name (eg, section) []:PiyoPiyo
SSLをとりたいサーバ名
Common Name (eg, your name or your server's hostname) []:hogehogehoge.jp
以下未入力
Email Address []:

Please enter the following 'extra' attributes
to be sent with your certificate request
A challenge password []:
An optional company name []:
このCSRを使ってRapidSSLに申請する。たぶん半日もあれば証明書がもらえる
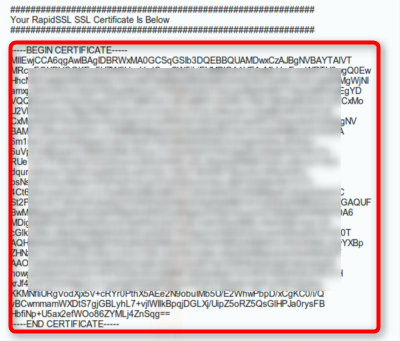
証明書がぶっきらぼうにメール本文にべっとりくっつけて送られてくる。 証明書っぽいのが2個くっついてくる
まず1個目の
############################################################
Your RapidSSL SSL Certificate Is Below
############################################################
ってこの赤枠部分をテキストファイルにはっつけるこれで完成
vi hogecrt.pem
はっつけて、保存完成
もう一個の
############################################################
Required Intermediate SSL Certificates (CA) Are Below
############################################################
は中間証明書というやつで証明するための証明書という位置づけ。もうわけわからんw
同様にはっつけて保存する
vi rapidsslca.pem
ApacheをSSL対応にするためにmod_sslをインストールする
yum install mod_ssl
はい完了
/etc/httpd/conf.d/ssl.conf
を編集する。
非常にそれっぽいところがあるのでここを書き換える
多分・・・
SSLCertificateFileにRapidSSLからもらったやつ
SSLCertificateKeyFileに自分で作った鍵の位置を書き込む
#   Server Certificate:
# Point SSLCertificateFile at a PEM encoded certificate.  If
# the certificate is encrypted, then you will be prompted for a
# pass phrase.  Note that a kill -HUP will prompt again.  A new
# certificate can be generated using the genkey(1) command.
SSLCertificateFile /etc/pki/tls/certs/hogecrt.pem

#   Server Private Key:
#   If the key is not combined with the certificate, use this
#   directive to point at the key file.  Keep in mind that if
#   you've both a RSA and a DSA private key you can configure
#   both in parallel (to also allow the use of DSA ciphers, etc.)
SSLCertificateKeyFile /etc/pki/tls/private/hogepk.pem
なんだか
/etc/pki/tls/
あたりに鍵置くみたいだからそこらへんに移動しておく
cp /root/hogecrt.pem /etc/pki/tls/certs/
cp /root/hogepk.pem /etc/pki/tls/private/
さっきの中間証明書もセッティング
#   Server Certificate Chain:
#   Point SSLCertificateChainFile at a file containing the
#   concatenation of PEM encoded CA certificates which form the
#   certificate chain for the server certificate. Alternatively
#   the referenced file can be the same as SSLCertificateFile
#   when the CA certificates are directly appended to the server
#   certificate for convinience.
SSLCertificateChainFile /etc/pki/tls/certs/rapidsslca.pem
cp /root/rapidsslca.pem /etc/pki/tls/certs/
/etc/init.d/httpd restart
起動時にパスフレーズを聞かれるので入力すると起動する
Stopping httpd:                                            [  OK  ]
Starting httpd: Apache/2.2.3 mod_ssl/2.2.3 (Pass Phrase Dialog)
Some of your private key files are encrypted for security reasons.
In order to read them you have to provide the pass phrases.

Server localhost.localdomain:443 (RSA)
Enter pass phrase:

OK: Pass Phrase Dialog successful.
これが面倒な人はパスフレーズを抜いてくれ。
443番ポートを開ける。
iptables -A INPUT -m state --state NEW -p tcp --dport 443 -j ACCEPT
/etc/init.d/iptables save
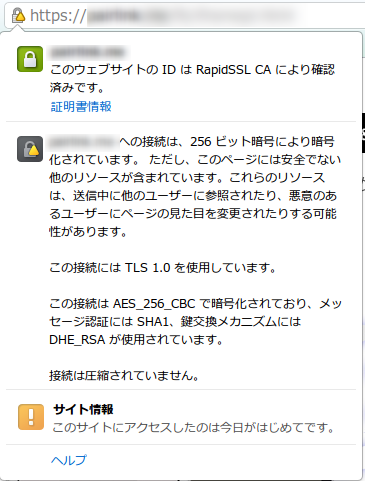
ブラウザでhttpsで接続して接続できるか確認。OK